Winter Sowing

So, recently I invited a group of homeschoolers over to do some "winter sowing." Winter sowing (WS) is starting seeds outside, in the winter, in transparent plastic milk jugs or other comparable containers. If you google "winter sowing" you will find a bunch of posts about it. It is attributed to one person in particular, but honestly, I am not sure that she is the first one to come up with it.
I have done WS for about 3 years now. The first year was not very successful. I started seeds in January and it was a tough winter. It was just too cold for successful germination, aside from some cold crops (peas, lettuce, broccoli). I skipped the next year and then read up on it more. There were new posts about WS and one person mentioned starting more delicate plants in March (tomatoes, peppers). The past 2 years I have started my seeds in early March and have had some pretty good luck with seedlings.
The nice thing about WS is that you do not have to start your seeds under a light or in a window, continually water them, nor do you have to harden them off when it is time to plant.
This is how I do my winter sowing.
1. Gather one-gallon transparent milk jugs, rinse thoroughly. Throw away the tops, or find something on Pinterest to do with them. They are not needed for this project.
 |
| Gather gallon milk jugs. |
2. Poke about 4 holes for drainage in the bottom of each jug.
 |
| Poke holes in bottom. |
3. Holding the handle, cut around the middle of the jug about even with the bottom of the handle (approx. 5" from the bottom) leaving it connected at the handle as a hinge. Scissors work well.
4. Fill the bottom with potting soil to within about an inch of the cut.
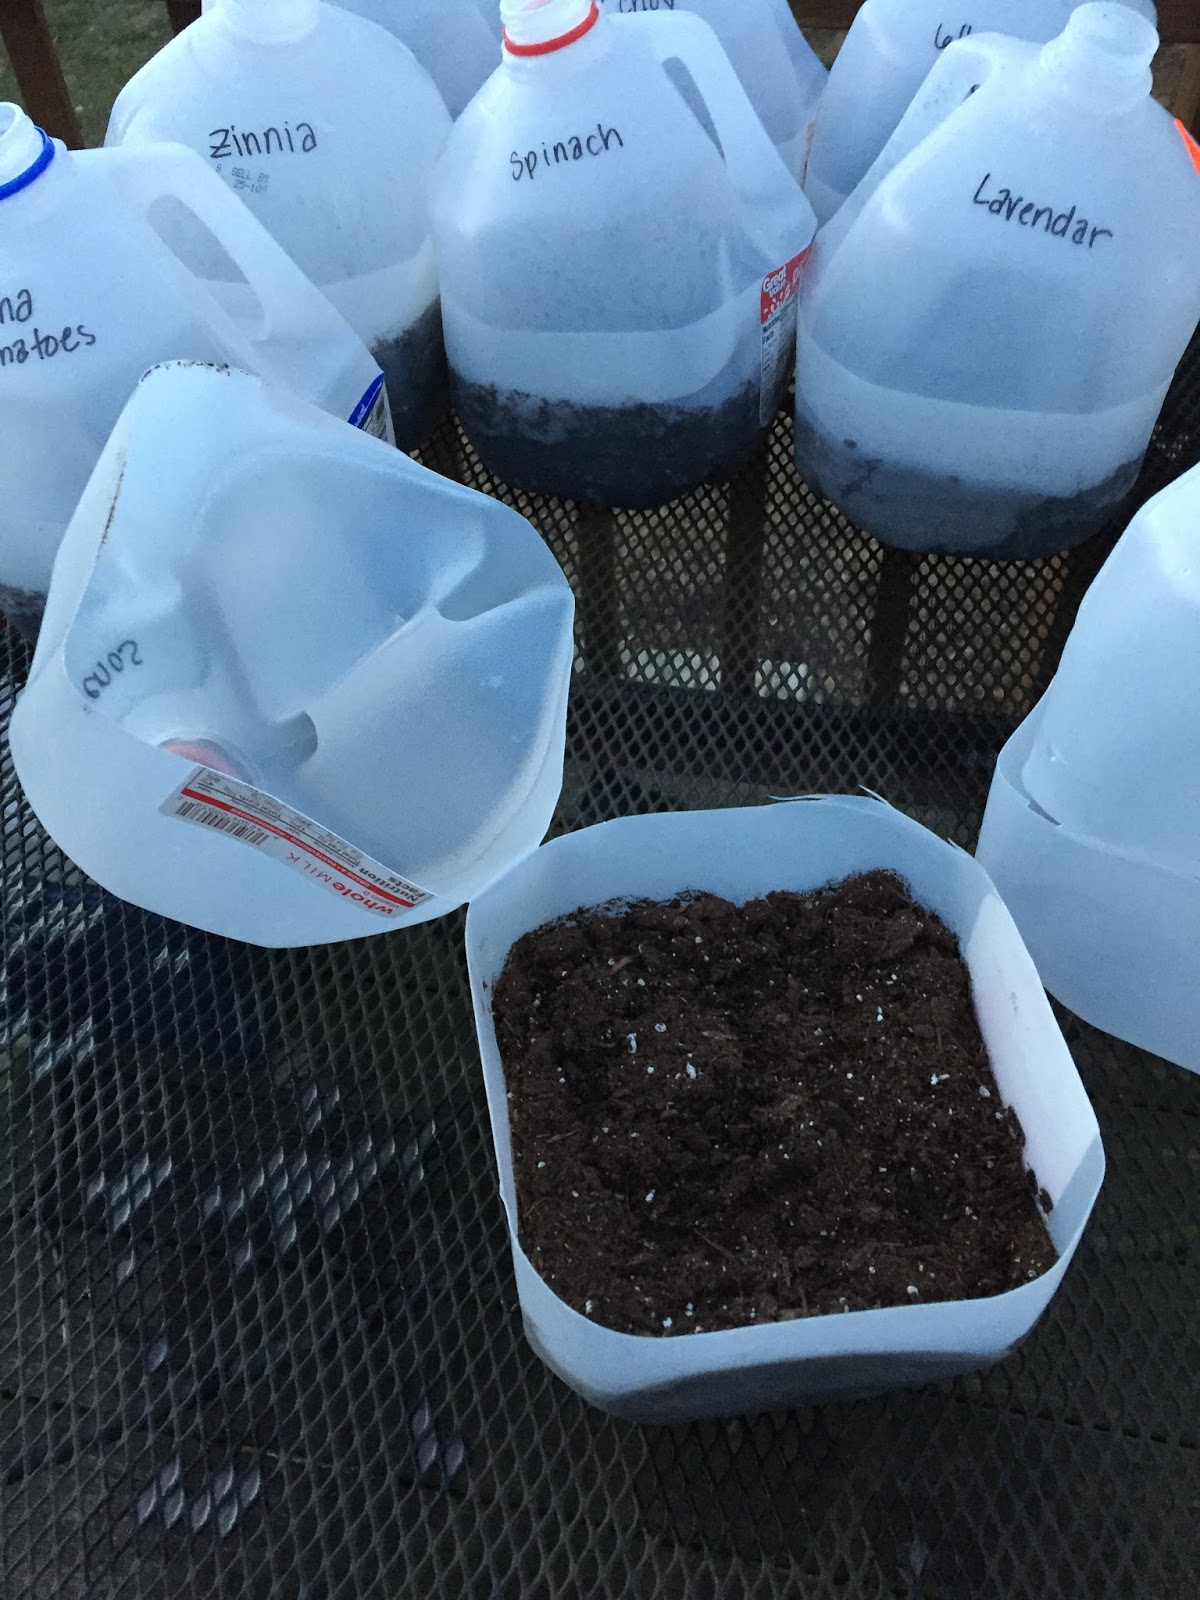 |
| Cut along middle of jug. Add potting soil.
5. Plant seeds in the soil. I usually plant 3 rows of 3 in holes evenly placed. Plant about 2-3 seeds in each hole. When more than one comes up, you will want to thin them to one. Yes, I know this is painful. They all look so happy, but they will not grow well, or at all if you leave them all to fight it out.
|
6. Water the seeds gently to be sure the seeds aren't dislodged and sent floating off.
7. Close the lid by wedging it down into the bottom. Most people suggest tape, but it will just quickly lose its stickiness.
8. Label with a Sharpie marker.
 |
| Label your jugs clearly. Many seedlings look alike. Wedge top down into bottom of jug. |
9. Put them out in a sunny area. I keep mine on the table on my deck, that way I can peek in and see if anything is growing periodically as I walk by.
Yes, it is okay if it snows.
Yes, it is okay if it gets below freezing.
Yes, it is okay if it snows.
Yes, it is okay if it gets below freezing.
10. On sunny, mild days in April or so, once the plants are growing, you can pop the top open for the plants to get the sun. Be very careful of wind though, windburn is more destructive than sun at this point. You may need to water them, but in my experience, there is enough moisture in the jug and randomly dripping into the top, that I have never needed to water them until the plants are large enough for me to open them up during the day.
11. Most plants are ready to go in the ground by May 15th or so, but check for the last frost date. It is worth it to just keep them in the jugs until after that. Cold crops can go in earlier. A mild frost will not hurt them.
 |
| When plants appear, they can spend some time open during the day. |
 |
| Some plants are difficult to contain! (Nasturtium far left.) |

