
Okay, so I started making these quilted bags and now a few people have asked me to make one for them. I just finished one for a friend and took pictures of the steps, to hopefully, teach you how to make one too.

First, find / purchase 5 fabrics that you like - you will need about 1/2 yard each for this size bag. The size can be adjusted, as it is just a fabric box.
You will also need: 1/2 yard of another fabric for lining, nice thread in the color that you would like to show in the quilting, and regular batting for quilting.

BEFORE you start cutting, find something that is square, meaning, a perfect right angle. Ask your husband if you can borrow his square, he might know what you mean.....but make sure it's not all dirty or something. I just used a piece of card stock to make sure the starting corner was a right angle. Trim either side to make it straight - the finished edge is generally straight, so line up your square there and make the cut edge at a right angle to that.
 Cut the fabric in to 3" squares (this will allow for 2" squares on your bag with 1/2" seam allowance everywhere. What is this 5/8" standard? That is like a math nightmare.)
Measure perfectly...or almost perfectly. If you are off, everything will be off in the end and the bag won't fit together right. Make a 3" grid on each piece and then cut the squares. I made about 20 - 24 squares of each at first, but then I needed more for the strap, so maybe 30 squares of each is good.
Your bag is like a cloth box 10" wide by 10" high by 4" deep. Once it is sewn together, each square will be 2" so your box will be 5 squares wide, 5 squares high, and 4 squares deep. Take your squares and lay out each "side" side of your "box" to make sure the patterns don't match at any point.
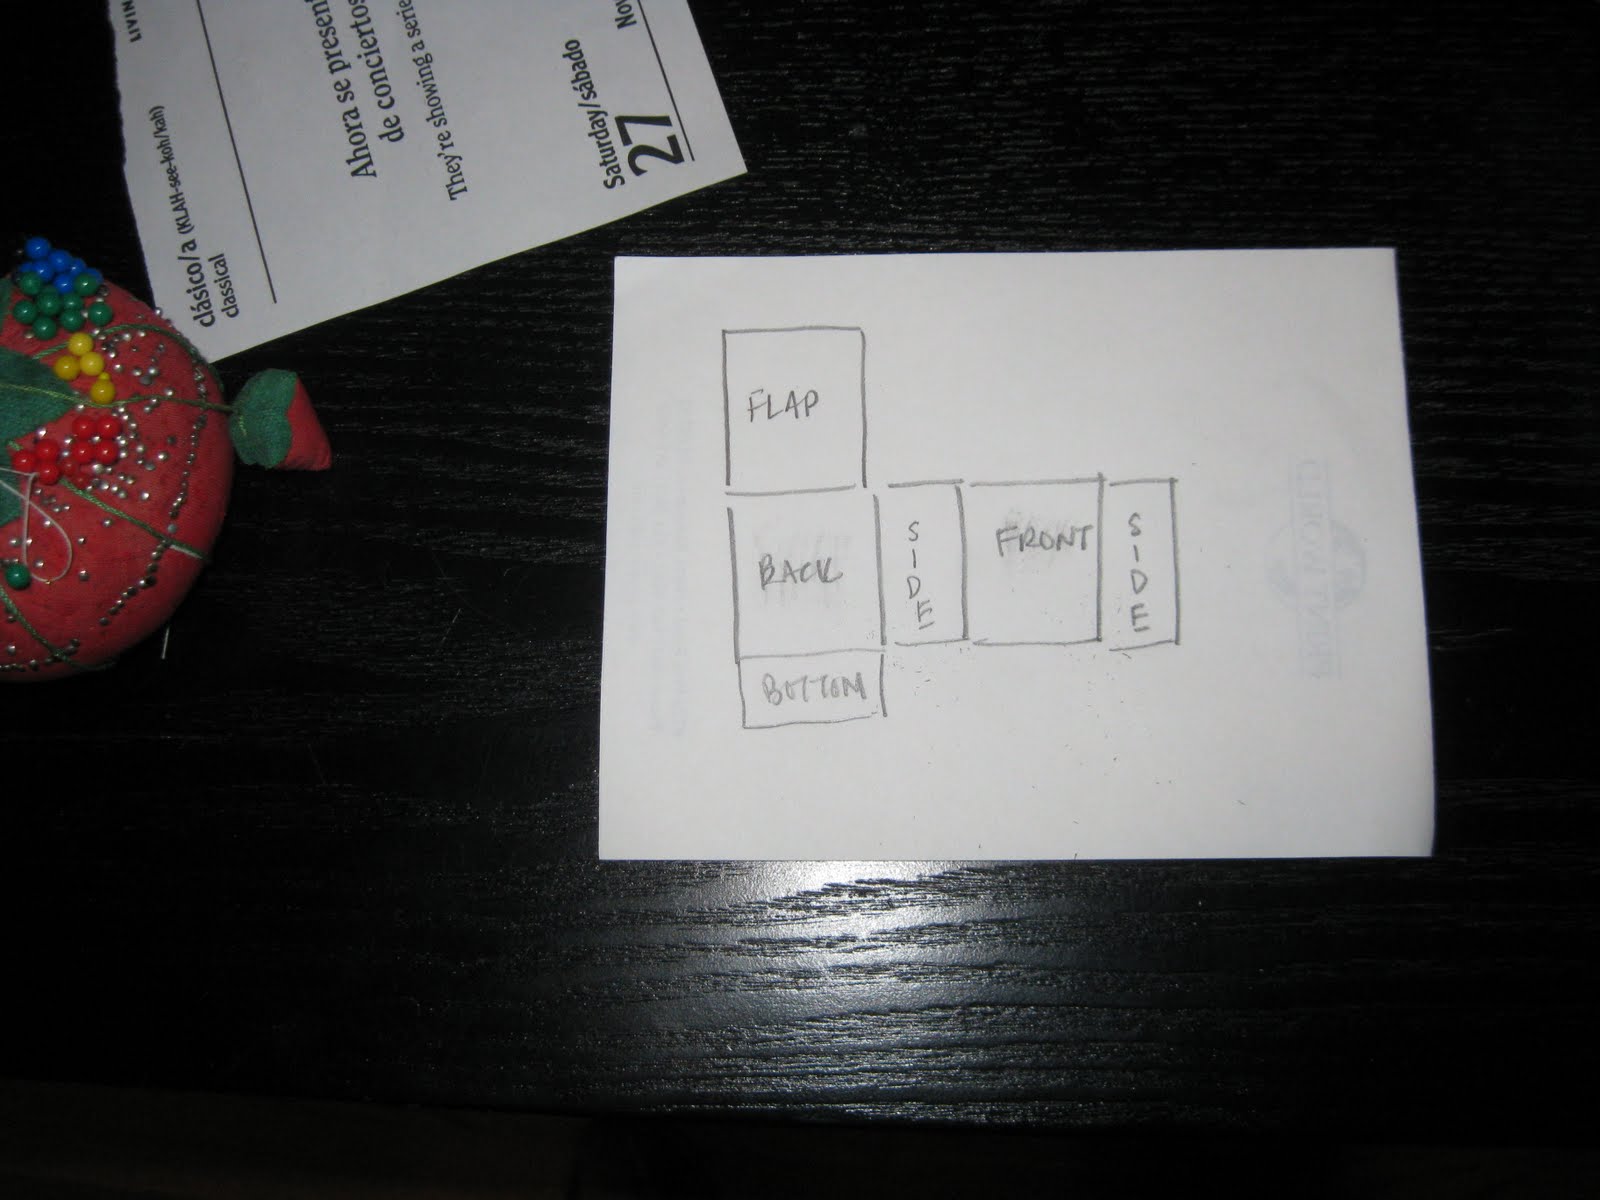
The front, back, and flap of the box will be 5 squares by 5 squares.
The sides and bottom of your box will be 5 squares by 2 squares.
Lay them all out and figure out where they will be attached:
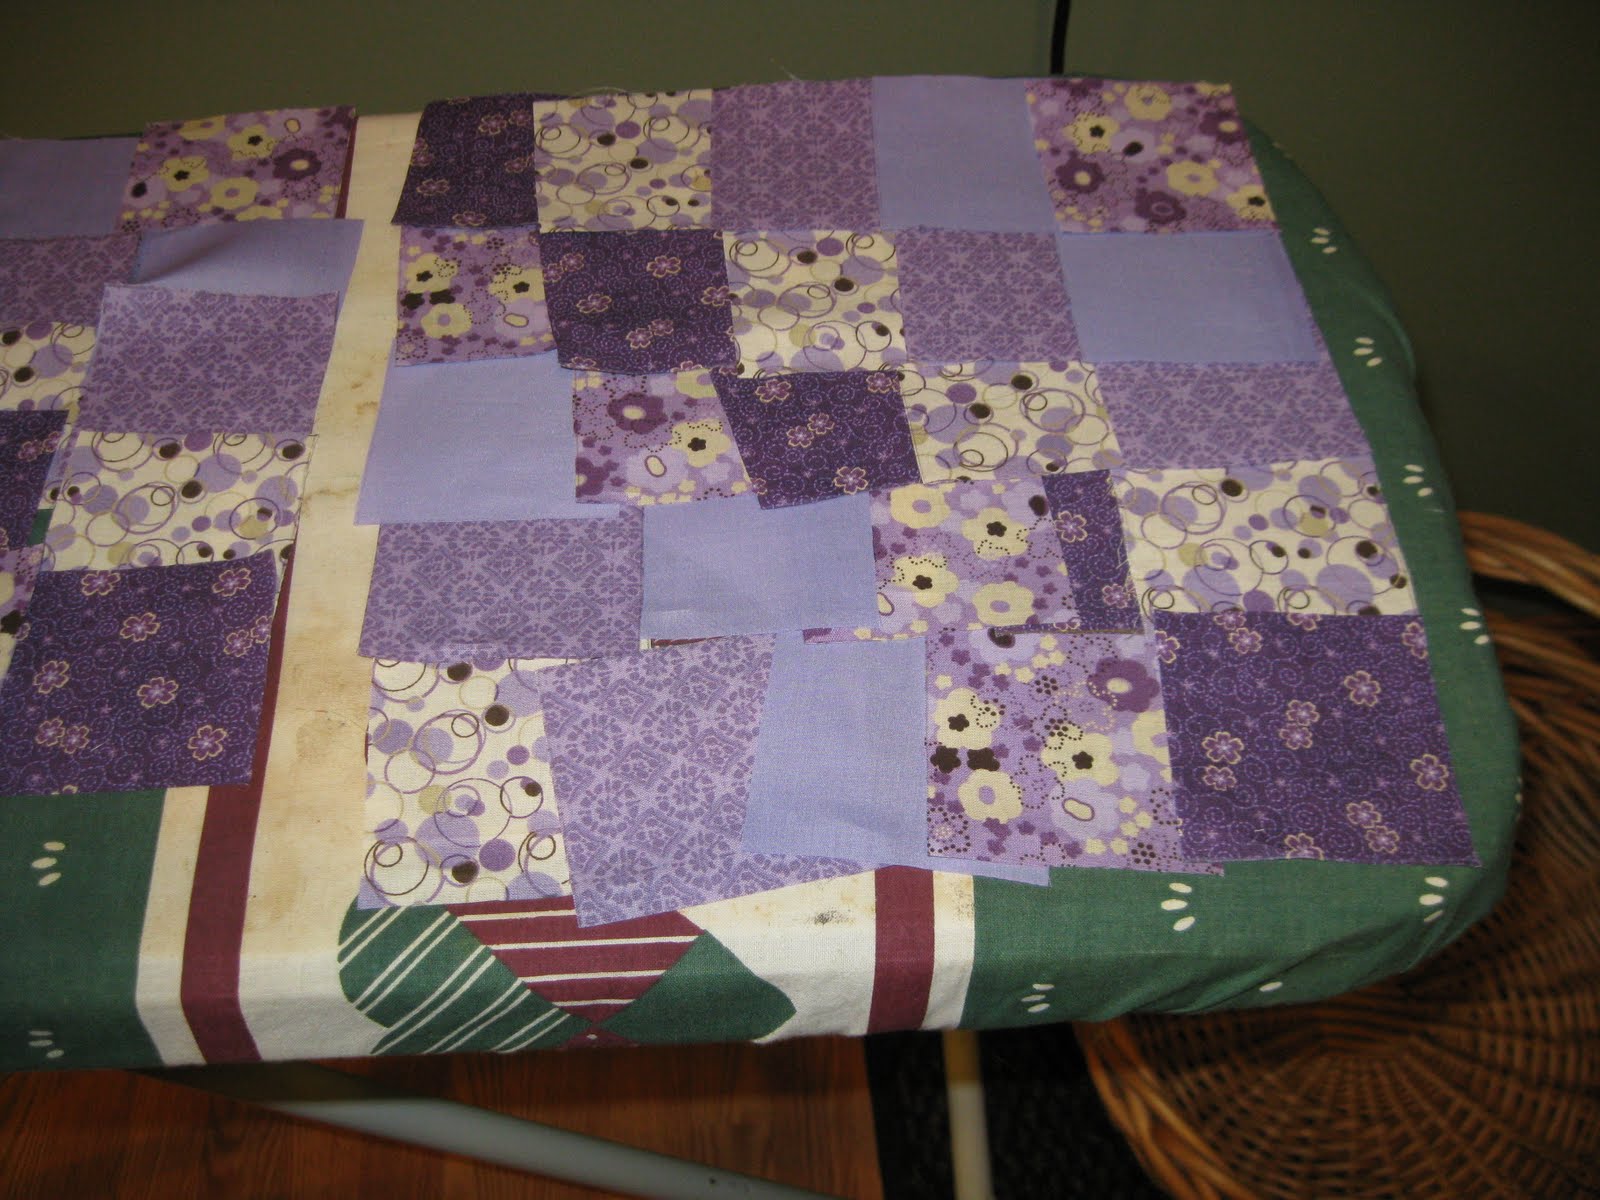
 I laid out the pattern and then had it continue across the sides as well. That way I knew the same colors wouldn't overlap. For the flap, I extended the pattern from the back upward in a mirror image.
 You can see it here on the far left. That is the back and the flap. Then one side, the front and another side. At this point, I had totally forgotten about the bottom....oops.
 Once you figure out your pattern, begin sewing your blocks together RIGHT SIDES TOGETHER with a 1/2" seam allowance. Keep the patterns set up and walk back and forth to get the pieces. Continually match up your pattern to make sure you are keeping it. You probably will mess up at least once. I have for each of the 4 bags I have made so far. Using the seam ripper is such a bummer. I should also say, back-stitch every time you end....all the time, with each quilted piece and on every seam you sew, you don't want the stitching to come undone, because once the bag is all together, it will be very tough to go back and sure-up any stitching.
You will end up with rows of blocks like the one I am holding above.
 Press open all of your seams......always.
 Now you will sew each of your 10" - 5 square rows together with a 1/2" seam allowance. RIGHT SIDES TOGETHER. Try to line up the blocks with each other and again, continue to check that you are lining up the pattern correctly. Remember to back-stitch at each end and iron open all seams as you are sewing.
 So, here it is again. Once you have sewn together the back, flap, front and sides, you should have a bunch of panels kind of like the above, but you, of course, remembered the bottom. So you have one more horizontal block that is 5 blocks by 2 blocks.
Like this:
 Sew together all of your panels, RIGHT SIDES TOGETHER, where they meet as in the drawn pattern above. Again, remember to back-stitch at each end.
 Lay out your pieced together bag (but, you of course, have included the bottom, not pictured above) on top of the batting. Cut the batting flush with the fabric like below. If your batting is in pieces, that is fine, it doesn't need to be all in one piece. Just pin it in place so it stays in place while you are doing the quilting (shown further below).
 Now, you are going to quilt your bag by top-stitching diagonally across the boxes.
My friend wanted an outside pocket, so I made another panel that matched the pattern where it would be sewn on. I cut a piece of lining, sewed the panel and the lining RIGHT SIDES TOGETHER with a little opening at the top to turn it right side out. I turned it right side out, top-stitched it (like a neat little empty pillow) and then sewed it directly in place about 1/8" from the edge on three sides, leaving the top open. Like this:
 You can see the top-stitched quilting pretty well in that picture too.
 Next cut your lining like you did the batting. If your piece of fabric isn't big enough to lay out the whole thing, you may have to piece it.
Do NOT sew the lining to the quilted piece! It's not time for that yet.
My friend wanted an inside pocket, so I made a little pillow out of lining, turned it right side out and sewed it to the lining in place. This lining was kind of unraveling, so I edge stitched all the edges. You know how you sometimes get a hole in your coat pocket or purse? It's because the fabric has come unraveled, more often than not. Hopefully this one won't.
 Next you are going to sew your lining together with RIGHT SIDES TOGETHER, like a little lining box. Again, remember to back-stitch at each end.
 It is easier to see how to do it with the quilted piece. Which you will also sew into a little inside-out box (with the flap hanging out of the top).
 The lining and the quilted pieces are sewn separately. Back with flap, side, front, and side wrapped around the bottom piece and sewn with a 1/2" seam allowance.
 Next, you are going to turn your lining right side out and slip it into your inside-out quilted bag. So they will be right sides together.
You will now sew them together with 1/2" seam allowance, around the edges of the flap and ALMOST all around the top edge of the bag, leave about a 4 - 5 " opening to turn your bag right-side out. I left just one side top open. Again, remember to back-stitch at each end.
 Pull everything carefully out through the hole.
 So, now you should have a lining bag inside a bag, with a lined flap too and a small opening on the side. Iron the flap and the edges flat. You can stick scissors or something pointy (not too) up into the corners of the flap to make the corners neat. You can also cut a piece of foam or other firm (preferably water resistant) flat piece to put on the bottom. Slip it through the hole and push it to the bottom between the lining and the bag. Now you can top-stitch the hole closed. Just fold over the edges (1/2") and top stitch about 1/8" from the edge.
 Now for the strap. Measure how long you would want it. Remember each square will be about 2" so for a 40" strap, you will need it to be 20 squares long. You will want it to be 2 squares wide so that is a total of 40 squares. (I think made 42 here.) Two sections of squares will be attached to the bag at each side.
Sew the squares together as you did for the bag sections.
 Once they are all sewn together, lay down batting along one side and stitch across it to hold it in place. (This will make 1/2 of the diagonal quilting pattern.) Next fold the whole strip in half RIGHT SIDES TOGETHER and sew them together with 1/2" seam allowance along one side. It's easiest to sew on the side with no batting. Now you have to turn this thing right side out. It's not easy, just persevere with it! Sometimes a plastic ruler is helpful to work it over. Some times kids with small fingers enjoy the job. ............... .............. .......... ................... .............................. .................. .................. .................. .................. ..................
What took you so long? Now iron your strap flat and neat. Top stitch the quilting in the opposite direction now. If you want full quilting on both sides, you can restitch on top of the other stitching. Tuck the edges under 1/2" and top-stitch them closed.
Now, put one end on the middle of each side of the bag, lining it up with the middle of the two squares that meet. Top-stitch it neatly in place. I did a box shape about 1/8" inside the edge of the square and then an x across it.
Now your bag is complete!


